
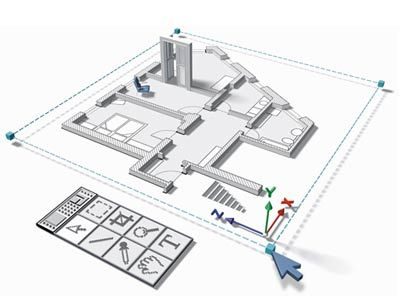

You need a floor plan before you break ground. No exceptions. A solid digital rendering of your home construction steps dictates the entire build process. It tells you exactly what to order and how to assemble it.
This first phase sets the stage. It ensures the project runs smoothly from day one.


Зміст
Pouring the Foundation: Getting the Concrete Right
Lumber, concrete, flooring, insulation, wiring. Once the pile of supplies hits the driveway, the real work starts. You can’t hang drywall or run wire until the ground is solid. The foundation is the single most critical component of your build. If it fails, everything above it fails.
Before you even think about mixing a batch, you need to lay out the perimeter. This is where precision matters. Measure twice, cut once. Mark the corners with stakes and string lines. Verify that your corners are 90 degrees. A slightly off square ruins the framing later.
The process breaks down into a few heavy steps:
- Formwork : Build the wooden forms. They hold the wet concrete in place. Make sure they are rigid. Use braces. If the forms shift during the pour, you end up with a lopsided wall that needs patching or worse.
- Rebar and Wire Mesh : Steel reinforcement prevents cracking. Lay it out according to your plan. Keep it off the bottom of the form with spacers. If the steel touches the concrete directly, you lose protection from moisture.
- The Mix : You can rent a drum mixer or hire a local ready-mix truck. For a standard slab, ready-mix is often faster and more consistent. But if you’re doing a small project or have limited access, a portable mixer works.
- Placement : Pour the concrete in sections. Don’t dump it all at once. Use a shovel or a pump. Vibrate the mix to remove air pockets. Air pockets lead to weak spots.
- Finishing : Smooth the surface. Use a screed to level the top. Then trowel it until it’s dense. Watch the weather. If it’s hot, the concrete dries too fast and cracks. Cover it with a tarp or plastic if needed.
Curing is the part everyone skips. Concrete needs time to gain strength. Keep it moist for at least 7 days. Cover it with wet burlap or plastic sheeting. Let it set. Do not rush this step. A rushed foundation is a cracked foundation.
Why Slab-on-Grade vs. Pier and Beam?
Which foundation type fits your site? It depends on soil conditions and local climate.
Slab-on-grade is common in dry, stable soils. It’s cheaper and faster to install. You pour a single layer of concrete over the ground. It works well for most suburban builds.
Pier and beam is better for areas with expansive clay or high water tables. It elevates the house above the ground. This allows air to flow underneath and prevents moisture from wicking up into the wood. It’s more labor-intensive. You dig, set posts, and pour footings.
If you’re unsure, check your local building code. They will tell you the minimum depth and reinforcement required. Ignoring the code is how houses end up with heaving floors and sticking doors.
Tools You Need on Hand
You don’t need a construction crew to pour a foundation, but you do need the right gear.
- Wheelbarrow : For moving mix.
- Concrete Mixer : Drum type is standard.
- Screed : Long level board to smooth the top.
- Trowel : For final surface


Get the foundation wrong and nothing else matters. Every wall, every joist, every nail depends on that concrete slab sitting level and true. You don’t get a second chance here.
Raising the wall framing
Once the foundation is set, you start lifting the walls. This is where the skeleton of the house comes alive.
- Pre-hang the walls. In a shop or on a flat surface, assemble the wall frames. Cut studs to length, space them 16 inches on center, and add headers over windows and doors. Pre-hanging saves hours on-site and keeps measurements consistent.
- Lift and secure. Use a come-along or a block and tackle to raise each wall section. Have helpers steady the top plates. As soon as a wall is vertical, toenail 16d nails through the top plate and into the rim joist. Add hurricane straps or hold-downs if you live in a high-wind area.
- Square the structure. Check diagonals. Measure corner to corner. They should match. Adjust shims under the bottom plates until the house is plumb and level.
Common framing mistakes to avoid
- Ignoring moisture. If the bottom plates touch wet concrete, they rot. Use pressure-treated wood or a moisture barrier like asphalt-saturated felt.
- Skipping blocking. You need solid blocking at every end of a joist and at every wall end. It gives you a nail pattern for drywall and supports cabinets later.
- Forgetting fire blocking. Code requires solid wood between floors and at the top of walls where fire spread could happen. It’s not just bureaucracy; it’s safety.
Tools you need for framing
- Circular saw (7-1/4 inch) for fast cutting
- Jigsaw for notching and adjusting
- Nail gun (framing nails, 16d)
- Level (4-foot) and tape measure
- Come-along or block and tackle for lifting
- Stud finder (if you’re modifying existing frames)
Why framing order matters
You build from the bottom up. Walls go first, then floor joists, then roof framing. This sequence keeps the structure stable as you go. If you try to frame the roof before the walls are braced, the whole thing can shift.
“A house is only as good as its frame. Get the angles right and the drywall goes on easy. Get them wrong and you’ll be cutting and fitting for weeks.”
Checking for plumb and level
Use a 4-foot level on the outside face of every wall. Tap the wall with a rubber mallet if it leans. Shims under the bottom plate are your friend here. Small adjustments now save massive headaches later.
Where do you usually make the biggest mistakes? Most people underestimate how much time squaring takes. Budget extra. It’s not optional.



From Wall Skeleton to Roof Deck
The walls are up. You see the skeleton. Studs, top plates, headers, the whole rigid box taking shape. It looks fragile. It feels temporary. But structurally? It’s solid.
Now the real work starts. You need to close the top.
Roof framing is where mistakes get expensive. A bad cut here means a leak there, or worse, a sagging truss that drops the ceiling line. You are no longer dealing with vertical 2x4s. You are dealing with geometry, pitch, and load distribution.
Tools you need before you start:
– Circular saw with 7-1/4″ or 10″ blade
– Speed square or protractor
– Chalk line
– Circular level
– Ladder (extension, not a step stool)
– Safety harness if working above 6 feet
– Hammer and nail gun (16d nails for framing)
Don’t skip the chalk line. Draw your pitch lines on every rafter before cutting. Measure twice. Cut once. If your house is 24×36, you are looking at dozens of rafters. Each one has to match its neighbor within a fraction of an inch, or the roof deck won’t sit flat.
Calculating Your Rafter Cut
Here is the part that trips people up. The roof isn’t a triangle. It’s a series of triangles.
Take your roof pitch. 8/12 is common. That means for every 12 inches of run, your rise is 8 inches. Use a speed square to mark your common board foot cut. Set the rise on the top edge, the run on the bottom. Cut along the line.
But wait. You have to account for the birdsmouth. That’s the notch where the rafter sits on the top plate. Measure from the plate top up to your plumb cut. Typically 2-1/2 inches for a standard 2×8 rallow on a 2×6 top plate. Adjust if your plates are doubled.
“A sloppy birdsmouth is a weak joint. It fails at the shoulder first.”
If you are using prefabricated trusses, this section gets simpler. You don’t cut rafters. You install the truss. But you still have to support them. You need bearers or beams where the trusses land. Check your plan. Most residential trusses land on a bearing wall every 4 to 6 feet. If your plan calls for an open floor plan, you might have a steel beam or LVL (Laminated Veneer Lumber) running the length of the house. That’s a different beast. Heavier. Harder to lift.
Laying the Roof Deck
Once the rafters are in place, you nail them down. 16d nails, two at the top plate, two at the birdsmouth if applicable. Check for plumb. Use a level. A rafter that is off by even a half-inch at the eave looks terrible. Worse, it throws off the shingle line.
Then comes the sheathing. 7/16-inch or 1/2-inch OSB (Oriented Strand Board) is standard. 4×8 sheets. Start at the eave. Work your way up.



Why Roofing Material Matters More Than Price
Don’t skimp here. Cheap shingles fail early. A good, energy-efficient roof cuts cooling bills in summer and heating costs in winter. You save money down the road. Big time.
Think about the layers. Wooden sheathing goes directly over the roof frame. It provides the structural base. Then comes roofing paper. This acts as a moisture barrier. Finally, the shingles get tacked on top.
The next step is to finish up the exteriors.
Getting the Layers Right
Sequence matters. Skip a layer and you invite leaks.
- Sheathing : Usually 7/16 inch or 1/2 inch plywood or OSB. It must be flat and secure.
- Underlayment : Roofing paper or synthetic underlayment. It slides under the shingles.
- Shingles : The visible skin. Asphalt is common. Metal or tile costs more but lasts longer.
Check the manufacturer’s warranty. Some void coverage if you use the wrong underlayment. Read the fine print.
Finishing the Exterior
Once the roof is done, look at the rest of the shell.
- Siding : Vinyl, fiber cement, or wood. It protects the frame from wind and rain.
- Windows and Doors : Install these before siding. Use flashing tape to seal gaps.
- Trim : Corners, eaves, and window frames. Paint or stain it to match.
Do this work in dry weather. Wet wood rots. Wet adhesive fails. Plan for sunny days.
Safety Check Before You Start
Working on a roof is dangerous. Slip and you are done.
- Use a sturdy ladder.
- Wear non-slip shoes.
- Never work alone.
- Check your local building code. Some areas require permits for roof replacement.
A good roof is an investment. It keeps the house dry and efficient. Do it right the first time.

Sealing the Envelope and Starting Siding
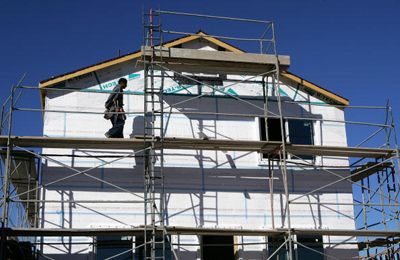
House wrap goes on last during the framing phase. It is not optional. The plastic membrane keeps wind, rain, and dust out while the structure sits exposed. You staple the edges, overlap the seams by at least 8 inches, and seal the corners. If you skip this step, you will pay for it later in moisture damage and higher energy bills.
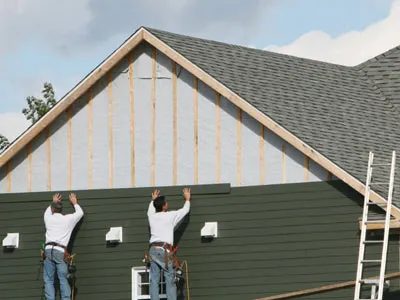
Once the wrap is up and secured, the exterior transitions to cladding. This is where the house starts to look like a house. You can choose brick, stucco, or horizontal lap siding. The choice affects both aesthetics and maintenance. Horizontal siding is generally the easiest for DIYers to install. You need a level, a saw, and a nail gun or hammer. Start from the bottom, work up, and leave a 1/8-inch gap between boards to account for wood expansion.
The exterior gives you the illusion of a finished project. It is a trap. The real work begins inside.
Do not celebrate yet. The shell is sealed, but the interior is still bare studs. You need to insulate, run electrical wiring, install plumbing, and hang drywall. The siding is the face. The interior is the body. And the body is where your time and money will actually go.

Wiring, Plumbing, and HVAC: The Invisible Backbone
Once the shell is weathertight, the real work begins. This is where the house actually becomes livable. You’re pulling wire, running pipes, and ducting air through the structure.
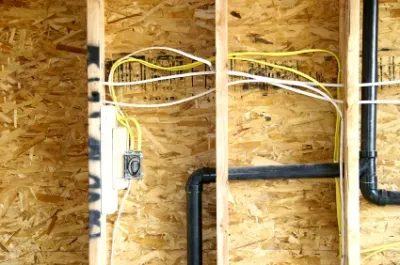
Wiring comes first in most builds because it dictates where your outlets, switches, and fixtures will end up. Use NM-B cable (non-metallic) for residential applications. Size it correctly: 12-gauge for 20-amp circuits, 10-gauge for 30-amp circuits. Always run wire through conduit in areas prone to moisture or physical damage. Label every line at both ends. Yes, it’s tedious. No, you won’t regret it when you’re troubleshooting a dead circuit in year three.
Plumbing requires precision. Use PEX for most interior lines. It’s flexible, resists kinking, and connects with crimp or clamp fittings, saving you hours of soldering or threading. For drain-waste-vent (DWV) lines, stick with PVC. Keep slopes correct: 1/4 inch per foot for 1.5-inch pipe, 1/8 inch per foot for 2-inch pipe. No slope, no flow. Gravity does the heavy lifting.
HVAC systems tie it all together. Choose a high-efficiency air handler with a SEER rating of 15 or higher if you’re replacing an old unit. Ductwork matters more than the equipment itself. Seal every joint with mastic sealant or magnetic tape. Leaky ducts waste energy and cause temperature imbalances. Size your ducts properly; undersized ducts create noise and reduce airflow.
Insulation: The Layer You Can’t See but Feel
Insulation isn’t a luxury. It’s the difference between a home that costs a fortune to run and one that holds temperature like a thermos.
Batt insulation (fiberglass or mineral wool) works well in standard wall cavities. Fit it snugly without compressing. Compressed insulation loses R-value. In attics, use dense-pack cellulose or blown-in fiberglass for better coverage. For floors over unconditioned spaces, rigid foam board or spray foam adds a thermal break.
Sealing is just as important as the material itself. Air sealing stops leaks at penetrations: where pipes, wires, and ducts pass through walls and ceilings. Use caulk for small gaps, spray foam for larger ones. A leaky home loses heat in winter and pulls in humid air in summer. That’s extra work for your HVAC system.
R-values matter. Check local building codes for minimum requirements, but aim higher for comfort. In cold climates, aim for R-60 or more in attics. In hot climates, R-30 to R-40 in attics is a solid start. Walls should hit R-13 to R-21, depending on climate zone.
“Insulation is the cheapest energy you’ll ever buy. Every dollar spent here pays for itself in lower utility bills.”
Test your work. Run a blower door test after sealing. It’ll show exactly where air is escaping. Fix those spots. Then sleep easy knowing your
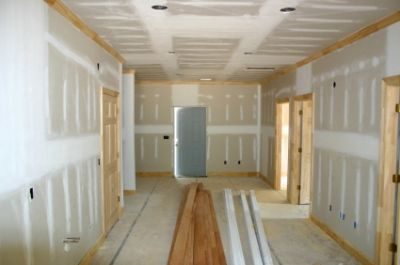
Drywall and Trimwork: The Final Interior Prep
Once the mechanical systems are locked in and insulation is packed tight, the interior shell needs to close up. This is where drywall and trimwork come in. Hang the sheets, tape and mud the seams, then install baseboards, crown molding, and door casings. Do this before you touch a single paint brush or tile saw.
You can’t do the fun part until the boring part is done.
Why wait? Because finishing surfaces over unfinished framing or exposed wiring is a recipe for headaches. Trimwork hides the gaps between walls and floors. It covers the rough edges of electrical boxes and HVAC vents. Get it right now, and the finishes you apply later will actually stick to something solid.
Tools you’ll need:
– Drywall saw and utility knife
– Taping knife and joint compound
– Miter saw (for trim cuts)
– Construction adhesive or finish nails
– Level
Work in sequence. Hang the wall panels first. Then the ceiling, if you’re doing one. Let the mud dry between coats. Rush this and you’ll sand for days. Trim goes on after the drywall is fully cured. Measure twice. Cut once. Square corners are non-negotiable.
Once the last piece of trim is nailed in, the room is ready for the part most homeowners actually enjoy: interior finishes. Paint, tile, wood, stone. Whatever you picked during the planning phase goes on now. The canvas is clean. The surface is flat. The time to make it yours has arrived.

Exterior Finishing Touches You Can’t Ignore
You nailed the interior. The cabinets are in, the floors are laid, the lighting is set. It looks like a magazine spread. But step outside. Look at the house. Is the brick dusty? Is the paint peeling at the corners? The exterior finishes the story. Without them, the interior feels unfinished, like a house still being built.
Start with the masonry. Brick, stone, or stucco needs cleaning before you paint or seal anything. Pressure washing works, but keep the nozzle at least two feet away. Too close and you blast the mortar. Too far and you just rinse dirt around. Use a wide fan tip. Work top to bottom. Rinse the gutter as you go so you don’t flood the foundation. Let the surface dry completely. 48 hours minimum. If you rush this, moisture gets trapped. Paint blisters. Sealer fails.
Paint and Stucco Prep
For stucco, check for cracks first. Hairline fissures? Prime them with an elastomeric coating. It flexes with the house. Bigger cracks? Cut them back with a chisel. Fill with a flexible patch compound. Sand smooth. Prime again. Then paint with an acrylic latex. It breathes. Oil-based paints trap moisture in stucco. That leads to delamination. Avoid it.
Brick is different. Don’t paint it unless you have to. If the brick is sound, leave it. Seal it instead. A penetrating silane sealer pushes into the pores. It repels water without changing the look. If the brick is spalling or chalky, you might need to paint. Use a masonry paint. It’s thicker, more alkaline-resistant. Apply two coats. First coat thinned. Second coat full strength.
Siding and Trim
Vinyl siding? Don’t paint it unless it’s cracked or faded. If it is, clean it with a tri-sodium phosphate solution. Scrub with a stiff brush. Rinse. Let dry. Paint with an exterior acrylic. One coat is usually enough.
Wood siding needs more work. Scrape off loose paint. Sand down to bare wood where needed. Fill knots with wood filler. Prime with a stain-blocking primer. Then two coats of exterior paint. Use a high-quality acrylic. Oil-based lasts longer on trim but takes longer to cure. Acrylic is faster, more flexible. Choose based on your climate. In humid areas, acrylic wins. In cold, dry areas, oil-based might hold up better.
Windows and Doors
Check the weatherstripping. If it’s brittle or missing, replace it. Foam or vinyl tape works for most frames. For sliding doors, use a rubber bulb seal. Caulk the gaps. Use a silicone-based caulk for vinyl. Acrylic for wood. Press it in with a wet finger. Smooth it. Wipe off excess before it skins over.
Doors need attention too. Check the hinges. Tighten the screws. Replace any that are rusted or loose. Lubricate the strike plate. Test the latch. It should click shut firmly. If it doesn’t, adjust the strike plate. Drill a new hole if necessary. This sounds small. But a door that doesn’t latch is a security risk.
Gutters and Downspouts
This is

Restoring the Yard After Construction
You’re back outside. The heavy machinery has left, but the mess hasn’t.
Your construction site likely needs a serious clean-up. You’re looking at debris removal, soil compaction, and lawn repair. The ground underfoot is probably hard as concrete in some spots. Other areas are just craters.
Why not plant some flower beds while you’re at it? It turns a scar into a feature.
Start with the cleanup. Rent a small skid-steer if the debris pile is big. Hand tools for the rest. Rakes, shovels, wheelbarrows. Clear out bricks, bags of concrete, and leftover lumber. Check for hidden hazards. Nails. Rebar. Sharp metal. Wear steel-toed boots and gloves.
Next, address the soil.
- Topsoil: Spread 2 to 4 inches over compacted areas.
- Seed or Sod: Choose based on your climate. Sod gives you instant green but costs more. Seed is cheaper but takes weeks to establish.
- Irrigation: Make sure your sprinkler heads weren’t buried or broken during the build. Adjust them so they cover the new lawn evenly.
Lawn care isn’t just about mowing. It’s about feeding the grass. Apply a starter fertilizer right after seeding or laying sod. Nitrogen helps the roots take hold. Water frequently for the first few weeks. Light, frequent watering beats deep, infrequent watering for young turf.
Now, the flower beds.
This is where you get creative. Pick plants that fit your specific soil type and sun exposure.
- Sun lovers: Black-eyed Susans, coneflowers, ornamental grasses.
- Shade lovers: Hostas, ferns, impatiens.
- Pollinators: Lavender, bee balm, native wildflowers.
Dig your beds to a depth of 12 to 18 inches. Mix in compost if your native soil is clay or sandy. This improves drainage and nutrient retention. Mulch around the base of the plants. Use 2 to 3 inches of shredded hardwood or bark. It keeps the soil moist and suppresses weeds.
Don’t ignore the edges. Define your borders with stone, brick, or metal edging. It keeps the mulch in and the grass out.
One last thing. Inspect the drainage. If water pooled on your construction site, it might still pool. Check the grade. The ground should slope away from your new structure. If it doesn’t, you’ll need to regrade or install a French drain. Water damage is a long-term problem. Fix it now, not in five years.
The yard won’t look perfect for a while. The grass will be patchy. The flowers will take time to bloom. But you’ve laid the foundation. Literally.

How to perform a final inspection before closing
You think you’re finished. You’re not. The final inspection is the only moment where you can legally demand corrections.
Walk the property like you own it. Because you’re about to. Test every light switch. Run water from every faucet, including the outdoor spigots. Flush every toilet. Check for spongy flooring or cracks in the drywall that appeared during the last week of construction.
Don’t ignore the small stuff. A squeaky door. A loose cabinet hinge. Missing paint touch-ups. These are cheap fixes for you to ask for, expensive ones to handle later.
If you found a problem, write it down. Photos help. But the contractor needs a clear list. “Kitchen island looks uneven” is not actionable. “Kitchen island top is level on the left side but sags 1/8 inch on the right” is.
This isn’t a time to negotiate major changes. It’s a time to fix what’s broken. Have your inspector or a trusted friend walk through with you. Two pairs of eyes catch more than one.
Get sign-off on the punch list before you hand over the keys. No sign-off, no close.

You’ve seen the portfolio. The reviews look solid. The first call went well. Now comes the part where you actually decide if this person is going to tear down your kitchen or build your addition without you losing your mind.
How to Vet a Contractor Before Signing Anything
Don’t just ask for a price. That’s the last thing you should focus on, and the first thing they’ll give you.
Instead, walk through these five questions. They cut through the fluff.
Which Specific License and Insurance Proof Do You Have?
“Licensed” is a broad word. Every state has its own contractor licensing board. Ask for the license number. Then, verify it. It takes two minutes on the state’s website.
Also, ask for a certificate of insurance. Not a copy of a policy from last year. A current certificate naming your property as the certificate holder. If they hesitate, walk away. You don’t want to be the one paying for a dropped hammer on your hardwood floors.
Why Should You Trust Their Timeline Over Their Past Projects?
“Fast” is a relative term. Ask them to break down the schedule. How many days for demolition? How many for framing? How many for inspections?
A vague “two to three months” tells you nothing. A detailed phase-by-phase plan shows you someone who has actually built before. If they can’t tell you how long the concrete cure time is, or when the electrical rough-in happens, they’re guessing. You don’t want a guesser in your house.
Where Do They Source Materials, and Who Pays for Changes?
Suppliers go out of business. Material prices jump. Ask how they handle price fluctuations. If lumber costs spike mid-project, do they absorb it, or do you? Get that in writing.
Also, ask which suppliers they use. Local lumber yards often have better stock and faster delivery than big-box warehouses. If they’re ordering specialty tile from a distributor across the country, ask about lead times. Delays are the enemy of a renovation.
How Do You Handle Disputes or Unforeseen Issues?
Every house has a surprise. A pipe behind the wall. A joist that isn’t where the blueprint says it is. Ask what happens then.
Do they issue a change order? Do they pause the work until you approve the extra cost? Or do they just keep going? The right answer is usually a pause and a written change order. If they say they’ll “figure it out later,” that’s a red flag. You need control over your money.
Which References Can You Call, and What Did They Ask Them?
Don’t just take the two references they hand you. Ask for three. Then call them. Don’t ask “Were they good?” Ask “Were they on time? Did they clean up? Did they finish on budget?”
Better yet, ask what they would change. The most honest answers come from people who had problems. If a reference says the contractor was “great,” but you can’t get specifics, it’s a weak endorsement.
The Final Check: Your Gut
You can verify the license. You can read the contract. You can call the references. But none of that replaces the feel of the conversation. Did they answer your questions directly? Or did they pivot to sales?
If you’re unsure, keep looking. There’s